

Key features
- Text input — Multi-line input with Enter to send, Shift+Enter for new line
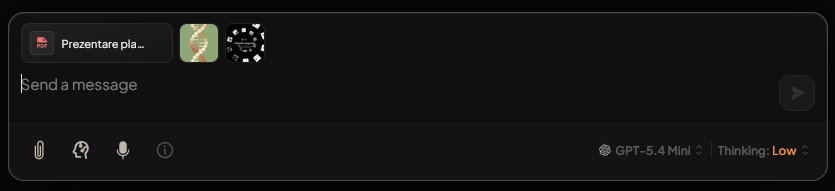
- File attachments — Paperclip or drag-and-drop (documents embed into workspace; images attach to the message)
- Agent selection — Choose specialized agents via button or
@agentname - Model selector — Override the workspace model per thread
- Web search toggle — Enable real-time web search for the thread
- Slash commands — Presets and quick actions (e.g.
/reset,/model) - Speech-to-text — Microphone for voice input
- Pinned documents — Documents prioritized for this thread (shown above input when set)
Text input
- Send: Press Enter.
- New line: Press Shift + Enter or Ctrl/Cmd + Enter.
- Focus on field: PressSpace.
- Auto-resize: Input grows as you type (up to about 5 lines), then scrolls.
- Placeholder: Shows "Send a message" when empty.
File attachments
How to attach
- Paperclip — Click the attach icon, then select files
- Drag and drop — Drag files onto the input area or chat
Attachment UI
- Files appear as chips above the input
- Shows status: uploading, success, or error
- Click X on a chip to remove
- Up to 10 files shown; extra files indicated as "+X more"
Agent selection
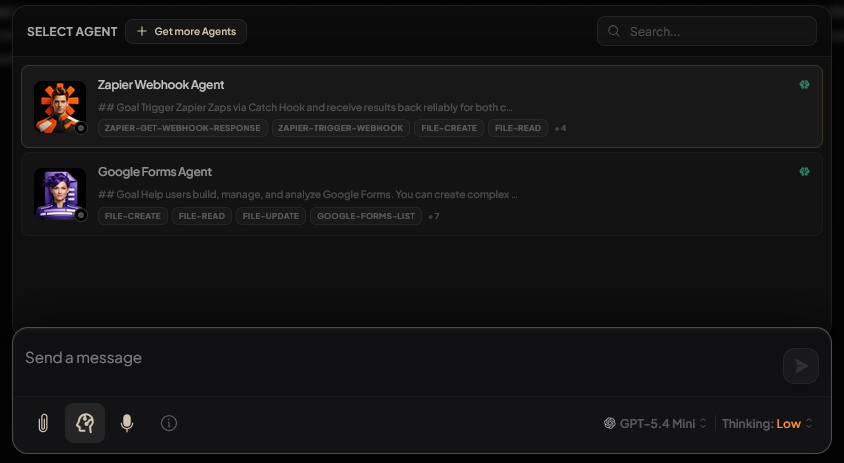
Agents are specialized assistants with distinct instructions and tools.
How to select
- Agent button — Click the agent icon in the toolbar; pick from the menu
- @mention — Type
@followed by the agent name; choose from suggestions - Keyboard — Press Insert to open the agent menu
Agent pill
- Selected agent appears as a pill in the input
- Remove: Click X on the pill, or press Backspace at the start of the message
- Message is sent to that agent when you submit
Model selector
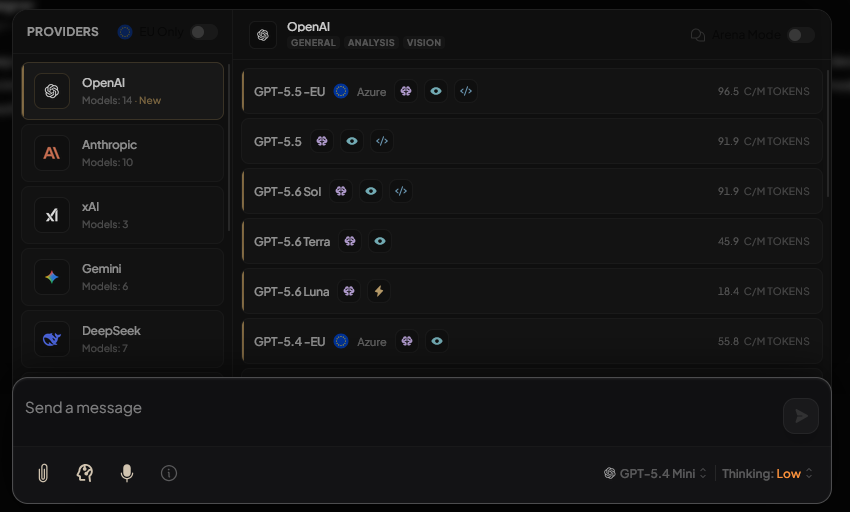
- Button — "Model:" in the toolbar opens the selector
- Options — Providers (OpenAI, Anthropic, etc.) and models within each
- System default — Use the workspace default model
- Scope — Selection is saved per thread
Web search toggle
- Button — Globe icon in the toolbar
- When on — AI can search the web for current information
- When off — Uses only workspace documents and model knowledge
- Use for — Recent events, real-time data, up-to-date facts
Speech-to-text
- Button — Microphone icon in the toolbar
- Shortcut — Ctrl/Cmd + M to toggle
- Flow — Speak; input shows transcript; message sends after a pause or when you stop
- Requirements — Microphone permission; browser with speech recognition support
Pinned documents
- Documents pinned to the thread appear above the input when configured
- Pinned docs are prioritized in AI responses
- Manage pins from Saved Items or the chat context menu
Keyboard shortcuts
| Key | Action | |-----|--------| | Enter | Send message | | Shift + Enter | New line | | Ctrl/Cmd + Enter | New line | | Escape | Unfocus input | | Backspace (start, agent selected) | Remove agent | | Insert | Open agent menu | | Ctrl/Cmd + M | Toggle speech-to-text |
Troubleshooting
- Input disabled — Wait for file uploads to finish, or check for errors
- Agent menu empty — Ensure agents exist and are assigned to the workspace
- Model not saving — Preference is per thread; re-select after switching threads
- Attachments fail — Check file type, size, and vision model for images
- Voice not working — Grant mic permission; use a supported browser
Related topics
For more information, see:
- Chat Thread Page Guide — Overview of the chat page
- Chat Top Bar Guide — Thread actions and navigation
- Workspace Document Upload — How documents reach the workspace