v1.0 live! Celebrating with 50% off -limited offer
-

Create new workspace

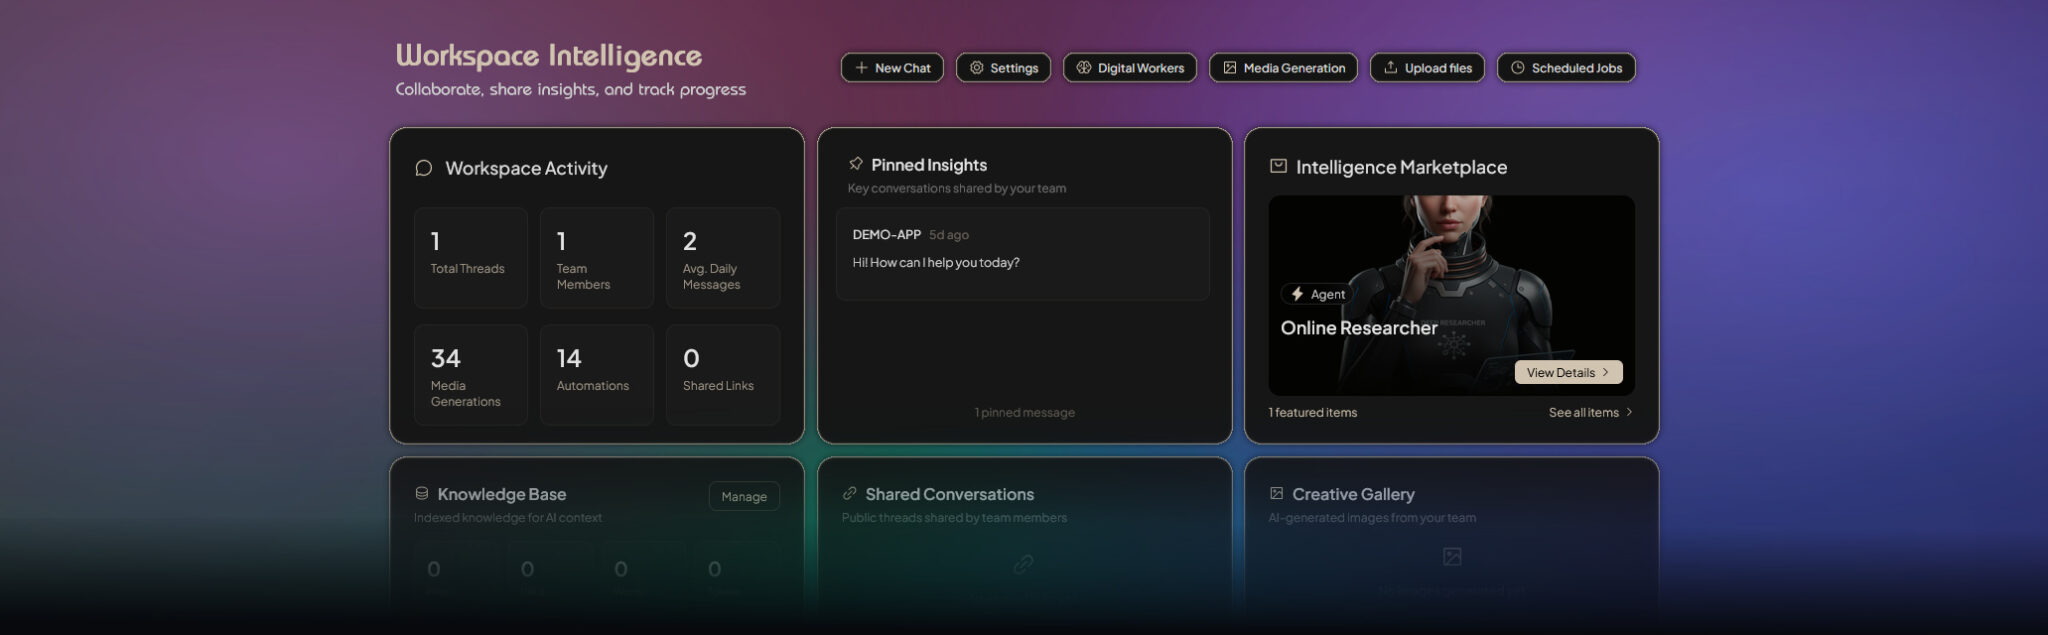
A workspace is your personal or team environment where you chat with AI, store documents, and run agents and workflows. Each workspace can have its own AI model, settings, users access and knowledge base.

Overview

Creating a workspace is a simple three-step process:
 
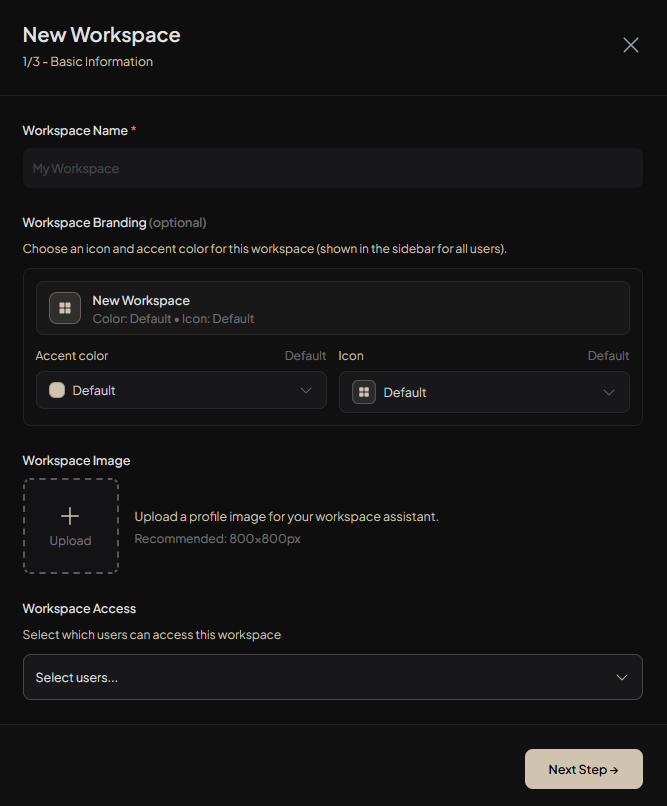
1. Basic Information - Name your workspace and set up access
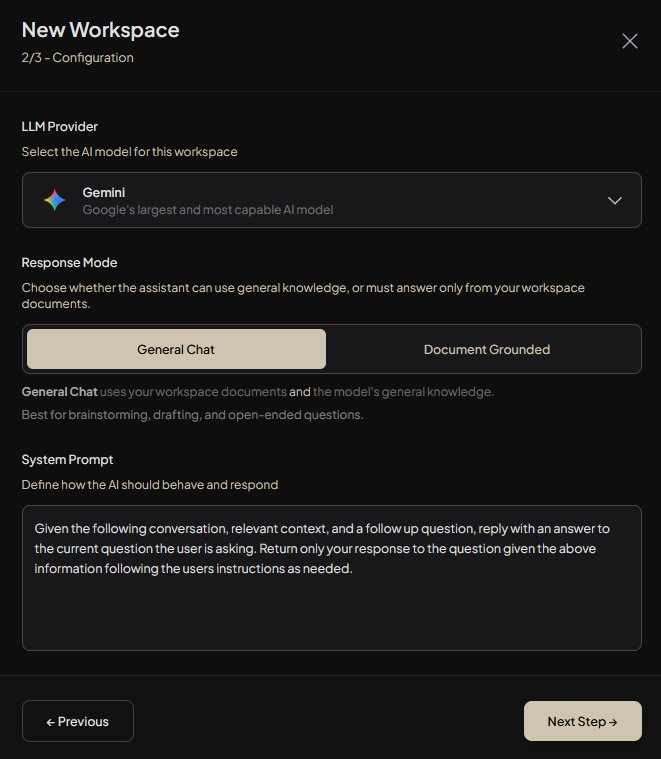
2. Configuration - Choose your AI model and chat behavior
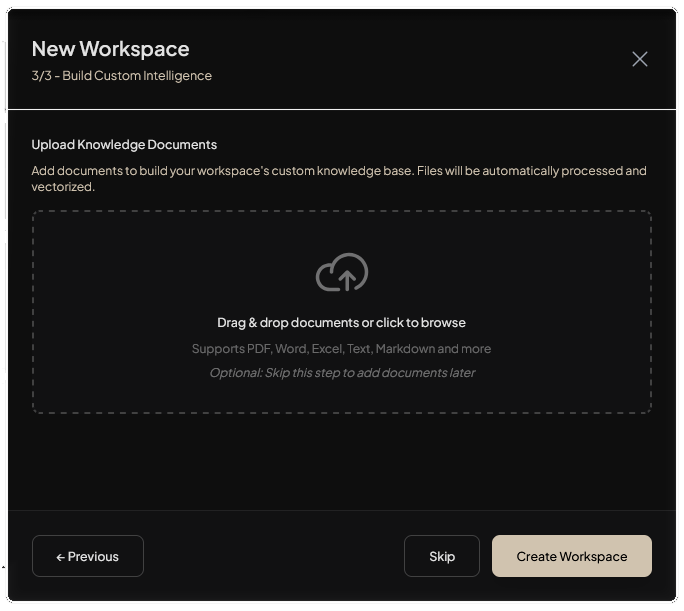
3. Build Custom Intelligence - Upload documents to create a knowledge base (optional

Step 1: Basic Information

This step collects essential details about your workspace.
NOTE: Administrators can always access all workspaces regardless of this setting.


Step 2: Configuration

This step lets you customize how the AI behaves in your workspace.

 Workspace Name (Required):

- Enter a clear, descriptive name for your workspace (e.g., "Marketing Team", "Project Alpha", "Personal Assistant").
- This name appears in your workspace list and helps you identify it quickly.
- You can change the name later from workspace settings.


Workspace Branding (Optional)

- Select icon type and color for easy destinction and more proper visual indicator.
Workspace Image (Optional)
- Upload a profile picture or icon for your workspace.
- This image appears next to your workspace name in the sidebar and helps with visual identification.
- Recommended size: 800x800 pixels.
- Supported formats: common image formats (JPG, PNG, etc.).
- You can skip this and add an image later, or change it anytime from settings.


Workspace Access

- Select which users in your organization can access this workspace.
- Click "Select users..." to open a searchable list of available users.
- Use the search box to quickly find specific users by username.
- Check the boxes next to users you want to grant access.
- Use "Select All" to add everyone, or "Clear" to remove all selections.
LLM Provider

- Choose the AI model that will power conversations and agent activities in this workspace.
 
Options include:
  - System default: Uses your organization's default AI model preference
  - Various providers: OpenAI (GPT models), Anthropic (Claude), Google (Gemini), and others configured by your admin
 
- Each option shows the provider name, logo, and a brief description.
- You can change this later from workspace settings if needed.
 
Tip: Different models have different strengths. Faster models are good for quick responses; larger models excel at complex reasoning.

Chat Mode

Choose how the AI responds to your questions:
 
Chat Mode (Default)
  - The AI uses both its general knowledge and any documents you've uploaded to the workspace.
  - Best for: General questions, brainstorming, creative tasks, and conversations that benefit from broad knowledge.
  - Example: "What are the best practices for project management?" will use both AI knowledge and your uploaded documents.
 
Query Mode
  - The AI only uses information from documents you've uploaded to the workspace.
  - Best for: Answering questions strictly based on your internal documents, avoiding general knowledge.
  - Example: "What did our Q3 report say about sales?" will only search your uploaded documents.
Next Step
You can switch between modes later from workspace settings. 
 
Once you've completed Step 2, click "Next Step" to continue.

Step 3: Build Custom Intelligence (Optional)


This step lets you upload documents to create a knowledge base for your workspace. Documents are processed and made searchable, so the AI can reference them when answering questions.

What Documents Do

- Documents you upload become part of your workspace's knowledge base.
- The AI can search through these documents to find relevant information when answering questions.
- This is especially useful in Query Mode, where the AI only uses your documents.
- Documents are automatically processed and indexed (this may take a few moments per file).

Supported File Types

- PDF documents (.pdf)
- Word documents (.doc, .docx)
- Excel spreadsheets (.xls, .xlsx)
- Text files (.txt)
- Markdown files (.md)
- Other formats may be supported depending on your organization's configuration.

How to Upload Documents

- Drag and Drop: Drag files from your computer directly onto the upload area.
- Click to Browse: Click the upload area to open a file picker and select files.
- You can upload multiple files at once.
- Files will be processed one at a time. You'll see progress indicators for each file.

During Upload

- Each file shows its name and processing status.
- Status indicators:
  - "Processing and indexing..." - File is being uploaded and prepared
  - "Successfully embedded" - File is ready and searchable
  - Error messages - If something went wrong, you'll see what happened
- You can remove successfully uploaded files by hovering over them and clicking the remove button (X icon).
- If uploads are in progress, you'll see a warning if you try to go back or close the modal.

System message:

Skipping this Step
- You can click "Skip" to finish workspace creation without uploading documents.
- You can always add documents later from the workspace's document management section.
- Your workspace will work perfectly fine without documents; it just won't have a custom knowledge base initially.
- Define how the AI should behave and respond in this workspace.
- This is a custom instruction that guides the AI's personality, tone, and approach.
 
Examples:
  - "You are a helpful assistant focused on technical documentation. Always cite sources and be precise."
  - "You are a creative writing assistant. Be encouraging and suggest improvements."
  - "You are a business analyst. Provide data-driven insights and structured summaries."
 
- If you leave this empty, a default system prompt will be used.
- You can edit this anytime from workspace settings.
 
Tip: Be specific about the role, tone, and any constraints you want the AI to follow.
 

Finishing Up


- Once all files are processed (or if you skipped), click "Create Workspace" to finish.
- You'll be taken directly to your new workspace dashboard.
- From there, you can start chatting, add more documents, configure agents, or adjust settings.